The following are instructions on how to upload a product on Musement using the Supplier Backend, if you want to know how to modify an existing product click here (video)
Fill in the necessary information on each step of the upload process.
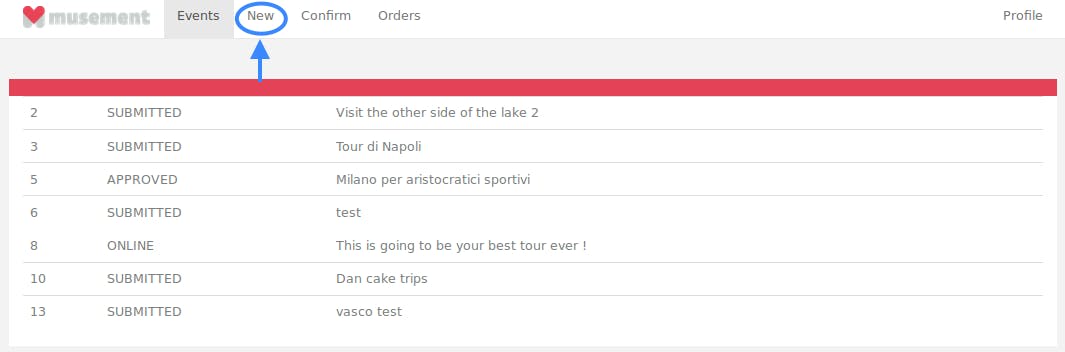
- STEP 1 - New Products -
Log in to your profile using this link
Click on "New" on the top menu to upload a new product
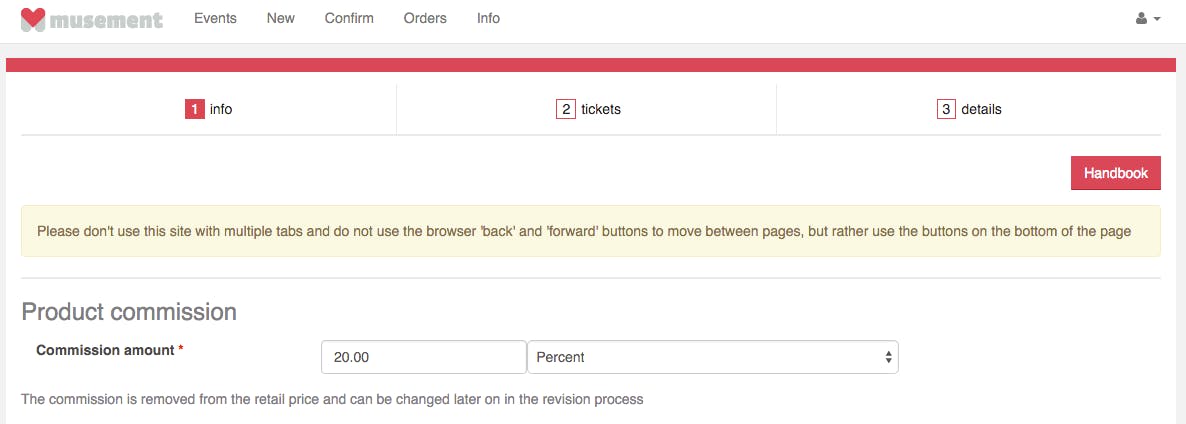
- STEP 2 - Product Commission -
Insert the Commission amount, specific to the product you are uploading. The commission is removed from the retail price and can be changed later on in the revision process.
Select whether this is a percentage or a fixed unit amount from the dropdown menu
Example: 20 - Percent
Example: 20 - Units (currency)
Note: The acquisition team must approve the general commission, according to your agreements with them. They will then check the individual product commission as well.
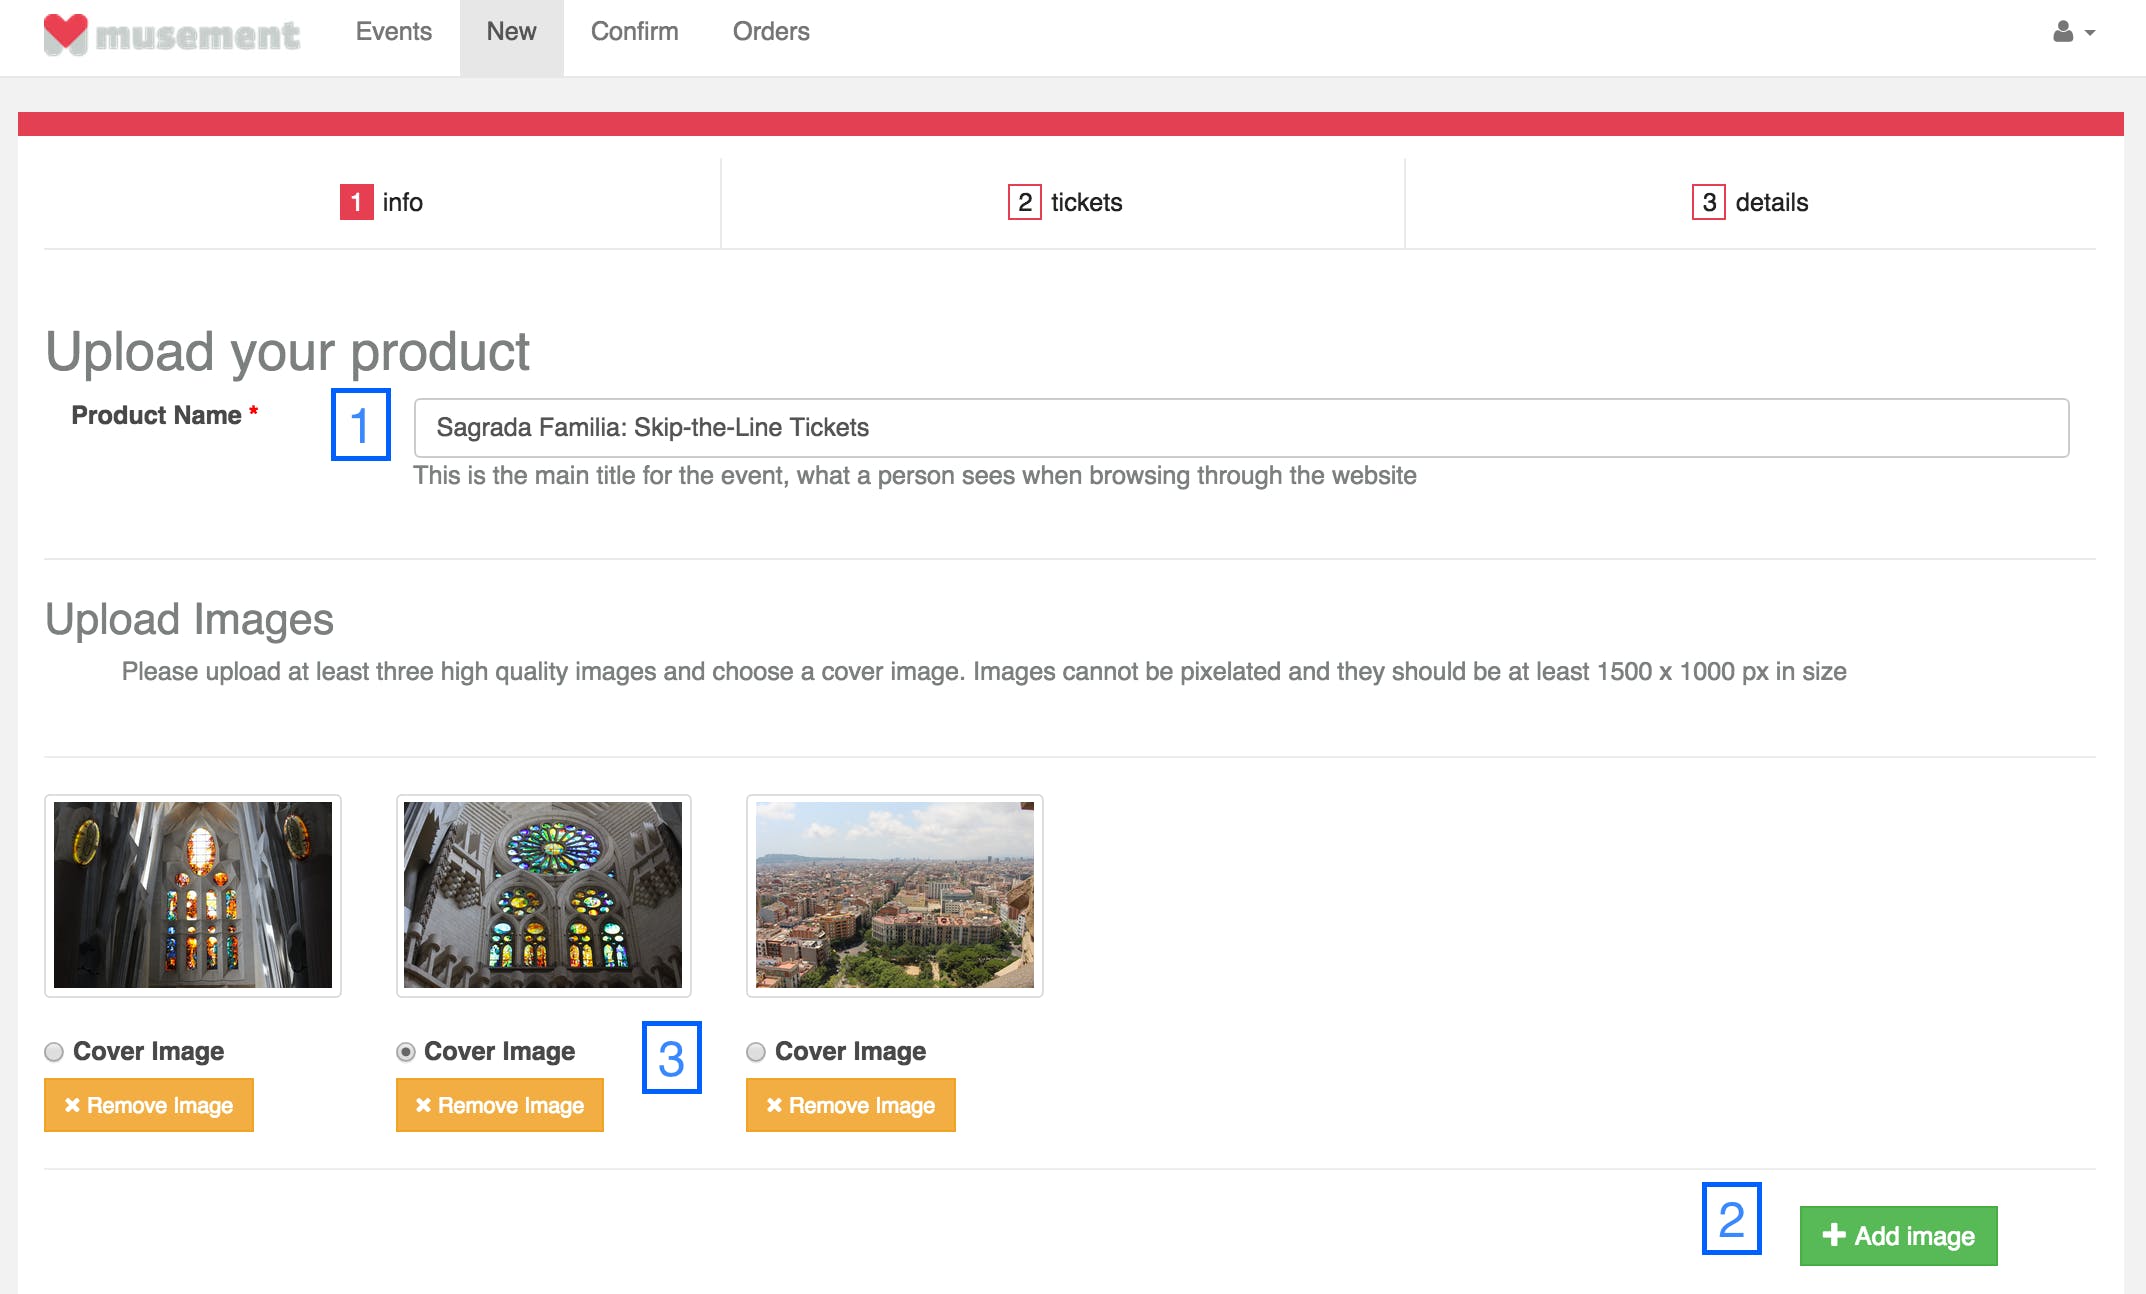
- STEP 3 - Title and Image Uploads -
Write the title of your product as shown in the screenshot
Upload at least 3 high-quality images
Images must be at least 1500 x 1000 px in size
The page cannot upload images over 5 MB
Choose a cover image
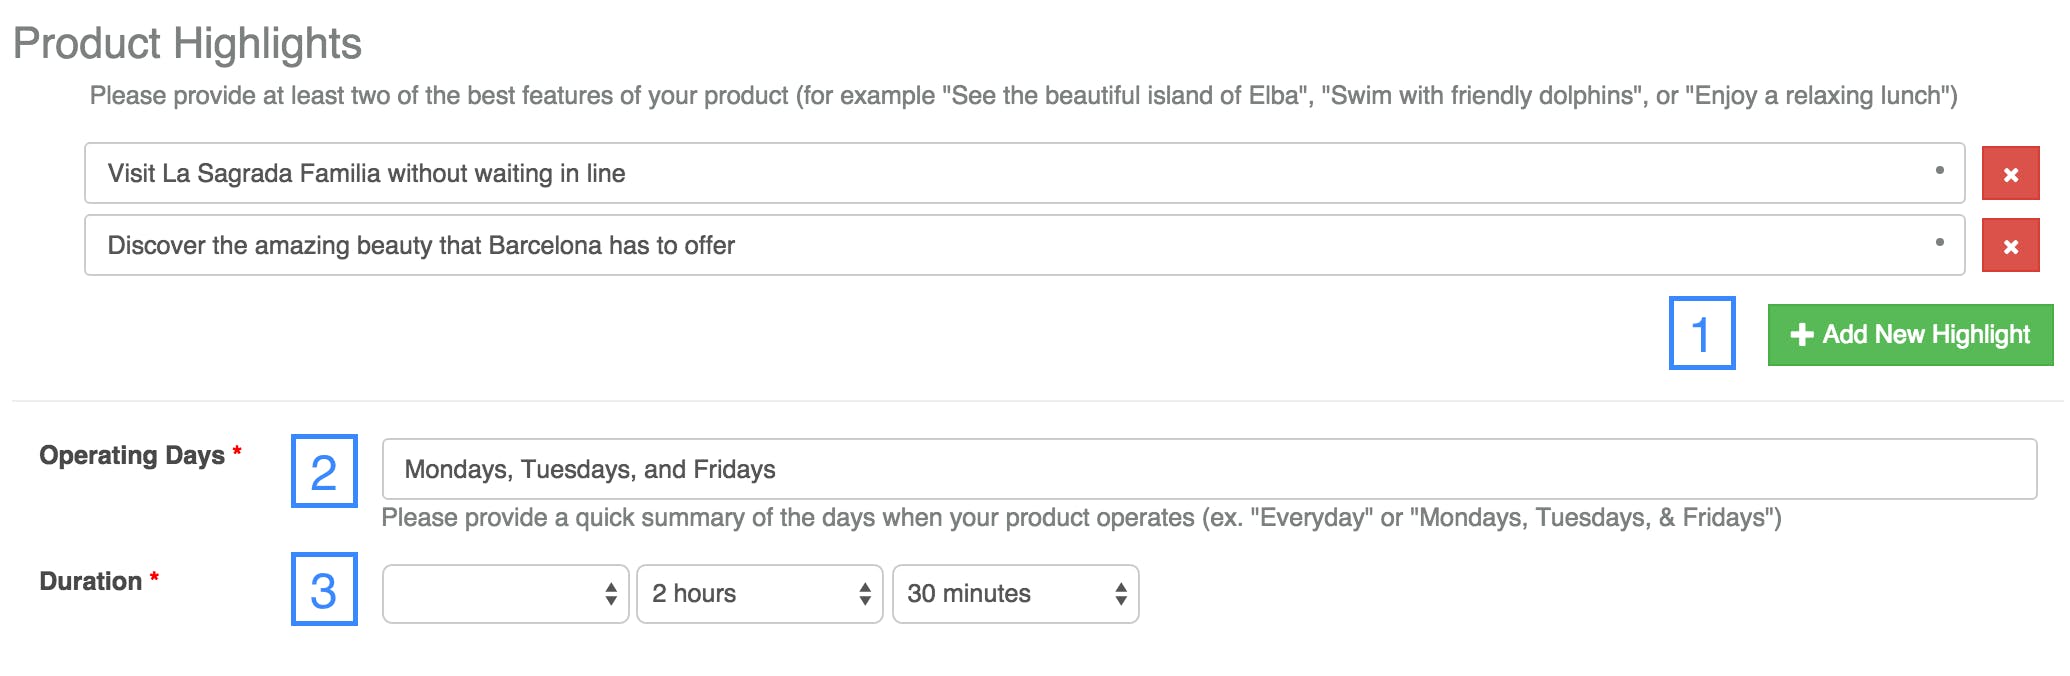
- STEP 4 - Product Highlights and Operating Days -
Highlights are important because customers read them before the product description:
Please provide at least two of your product's best features
Use short, informative, and imperative phrases to summarize what the product has to offer
Focus on the main selling points of your product
Provide a quick summary of the days when your product operates
Please provide only the days
Example: Mondays, Tuesdays, and Fridays
Provide the duration of the product by selecting from the options in the drop down menus
Example: 2 hours and 30 minutes
If there is no duration (open tickets or entrance tickets) then you may input the time you think it takes to complete the visit
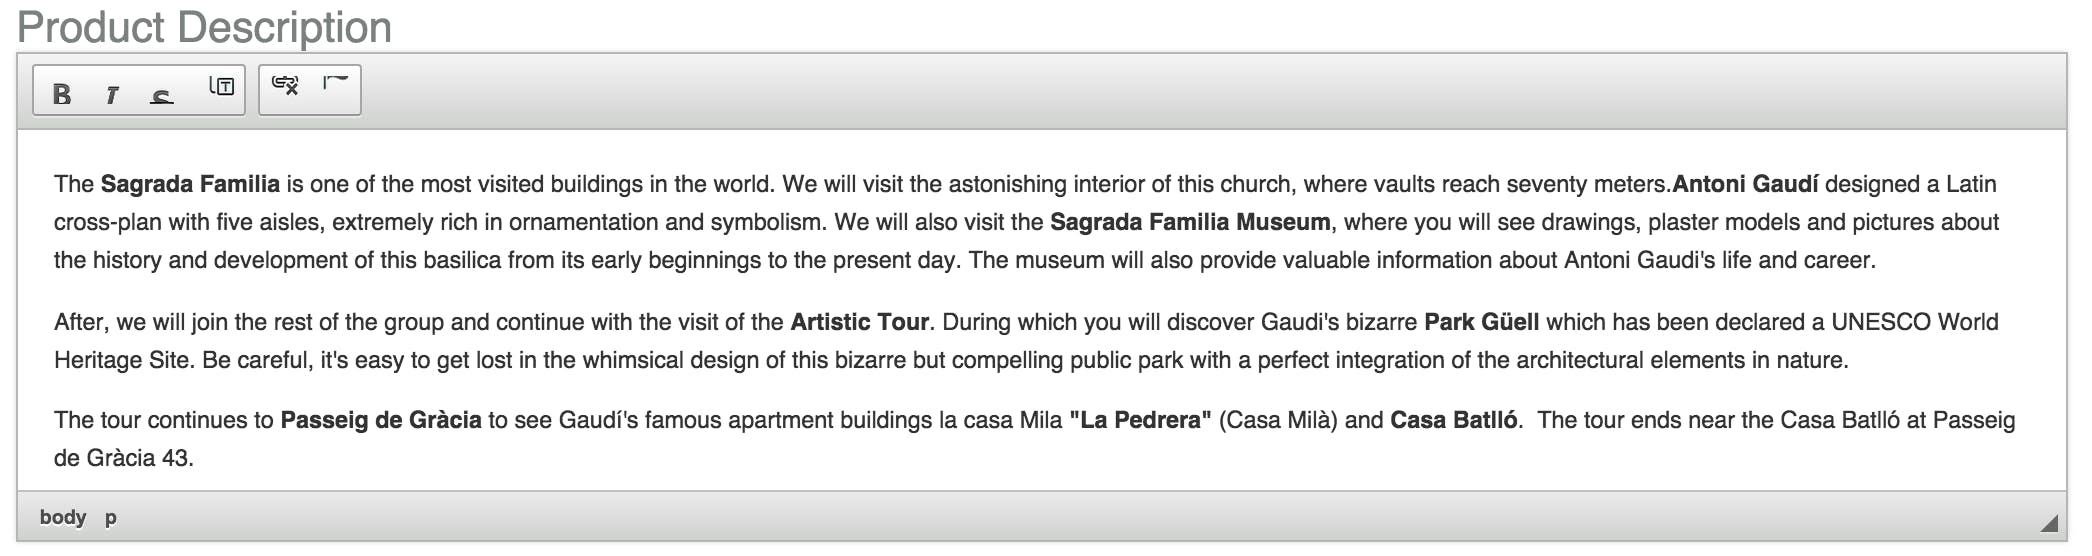
- STEP 5 - Product Description -
Please provide a few lines including an introduction and a couple of paragraphs. Insert an itinerary, if necessary.
Here is an example:
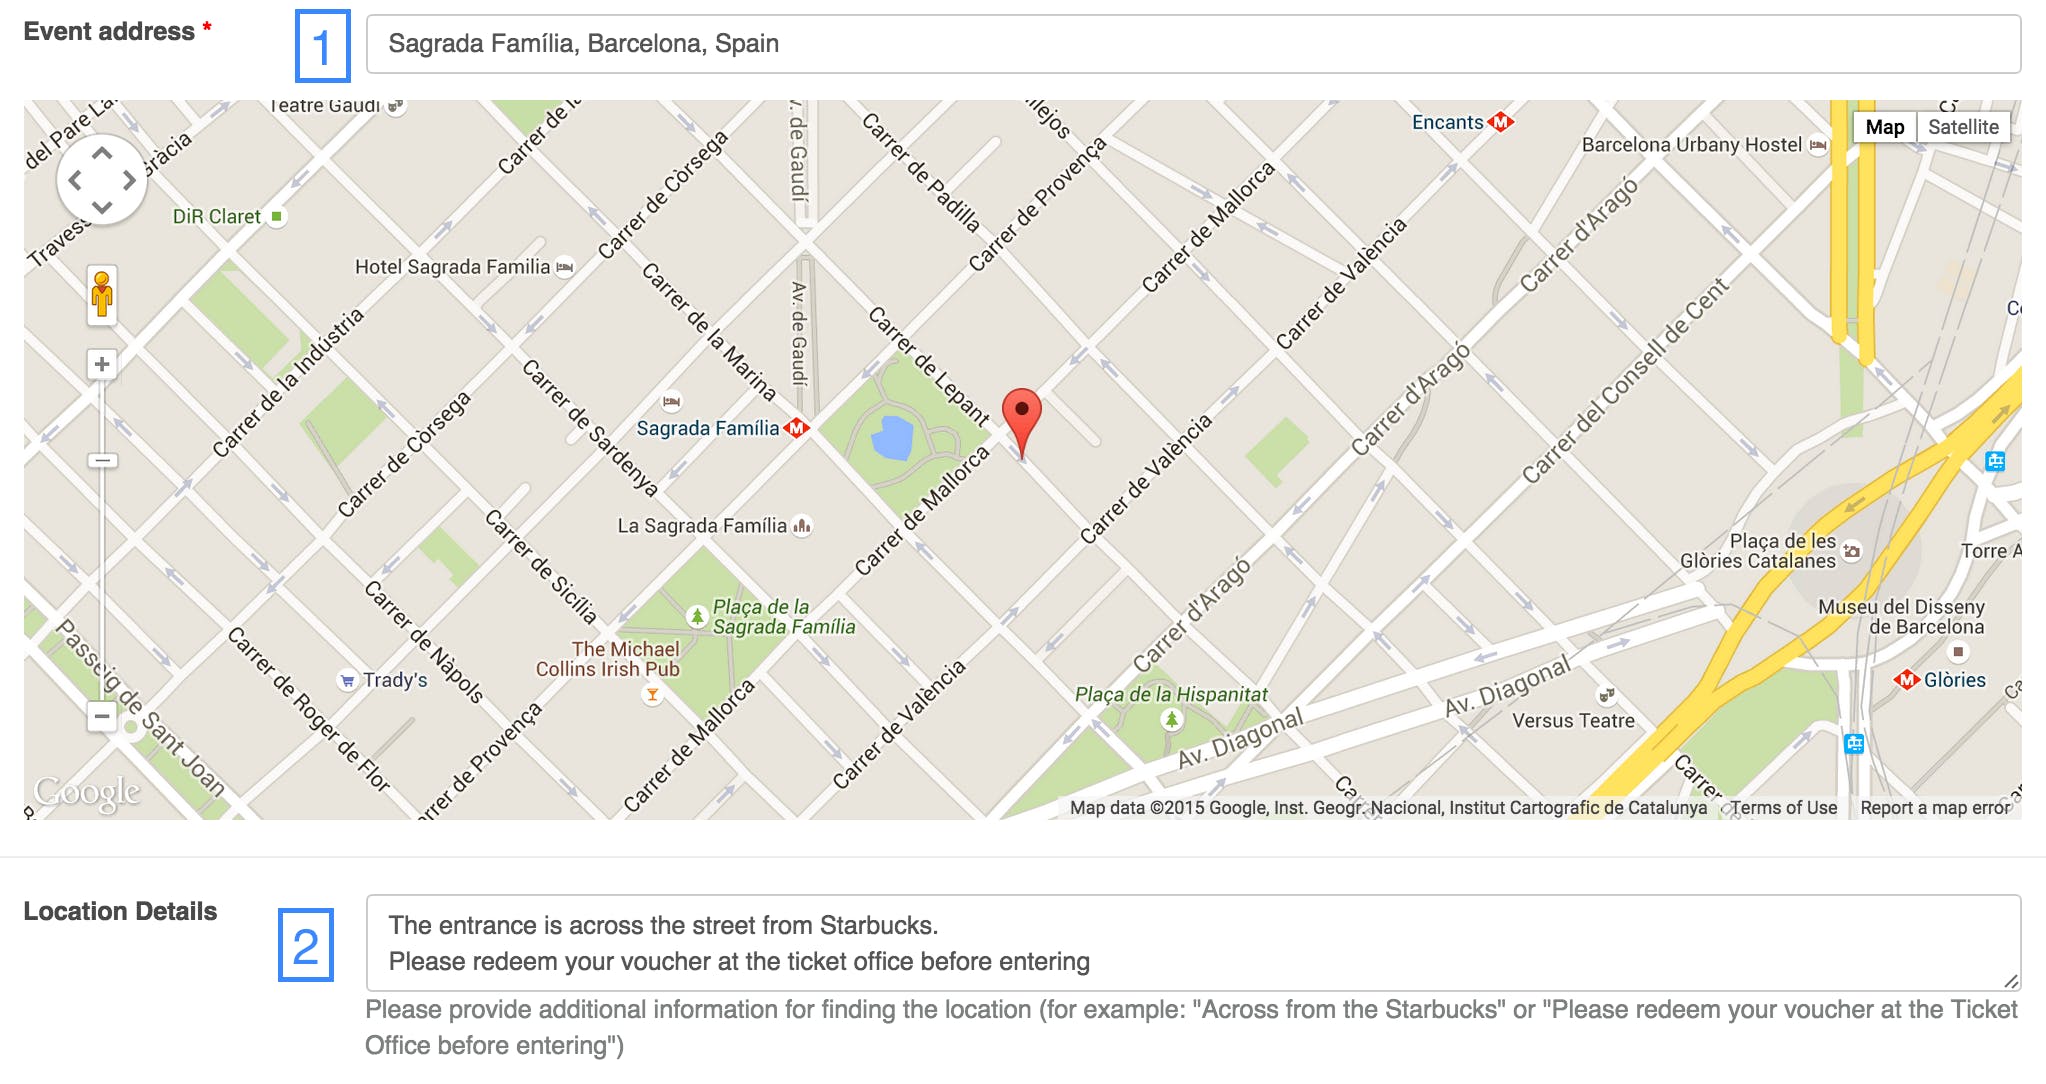
- STEP 6 - Event Location and Details -
Please provide the location data:
Event address: where the activity starts
You may search for a place and select from the options or enter the address directly
Example: "Sagrada Família, Barcelona, Spain" or "Carrer de Mallorca, 401, 08013 Barcelona, Spain"
Location details: additional information relevant to the client arriving to the location
Example: "The entrance is across the street from Starbucks" or "Please redeem your voucher at the ticket office before entering"
- STEP 7 - Product Inclusions/Exclusions -
Provide a complete list of what your product includes
Example: Entrance Ticket, Skip-the-Line service
Provide a complete list of what your product DOES NOT include
Things that people might feel are included, but are not
This could include but not be limited to: Tips, Drinks, Food, Dinner, Tour Guide, etc...

- STEP 8 - Tour Day and Time Details, Important Information, and Reductions -
Provide a detailed description for the day and times your product operates
Include meeting times, blackout dates, departure times, and running hours when applicable
Example: Every day at 3:00 pm; Meeting Time: 2:30 pm; Blackout dates: September 11 and 24; Running Time: 3 hours
Provide additional information regarding the client and the tour
Include dress code details, terrain warnings, limitations, etc...
Example: Dress code is enforced, no sandals, tank tops or skirts; The tour is not wheelchair accessible
Provide Important Information; this is what is written on the voucher the client receives after purchasing the product
Example: Please print out your voucher and show it to your guide upon arrival; You may also show your ticket on your smart phone in PDF form
Provide information regarding Price Reductions
Be sure to add the age range in the following format
Example: Children (4-10 years old); Students (17-25 years old); Seniors (over 65 years old)
When finished, click "next" at the bottom right of the page

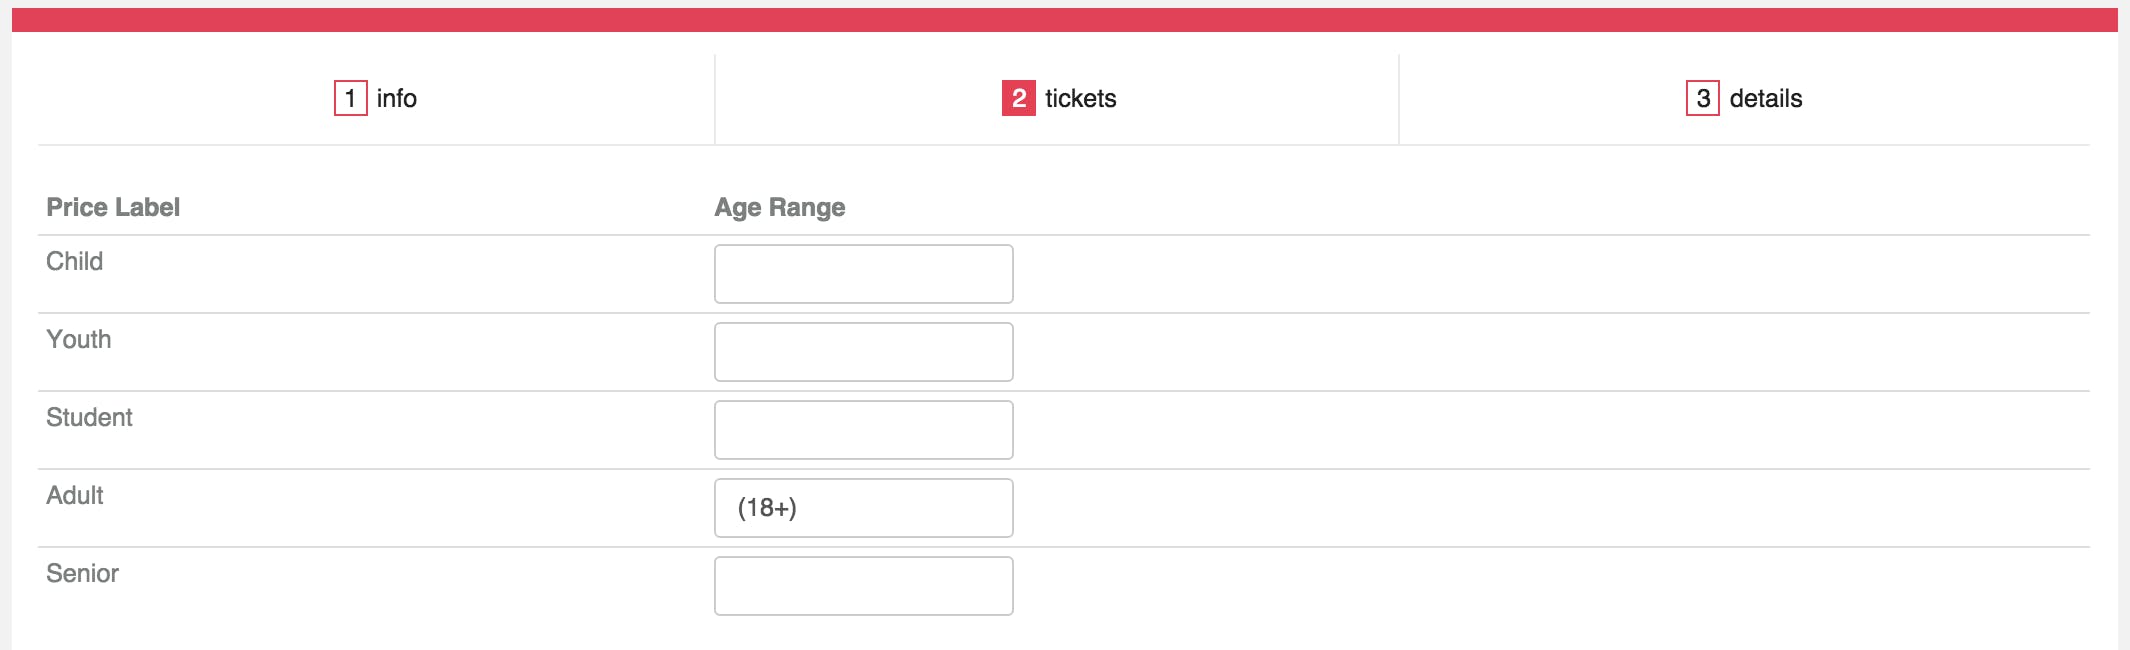
- STEP 9 - Price Labels and Age Ranges -
Fill in the age ranges for the different price labels.
It is NOT mandatory to select all price labels.
In this case there is only one type of ticket, so we only chose Adult
Include the age range for specific price labels if necessary
Children (0-12)
Please don't include "years old", only the age range in parentheses
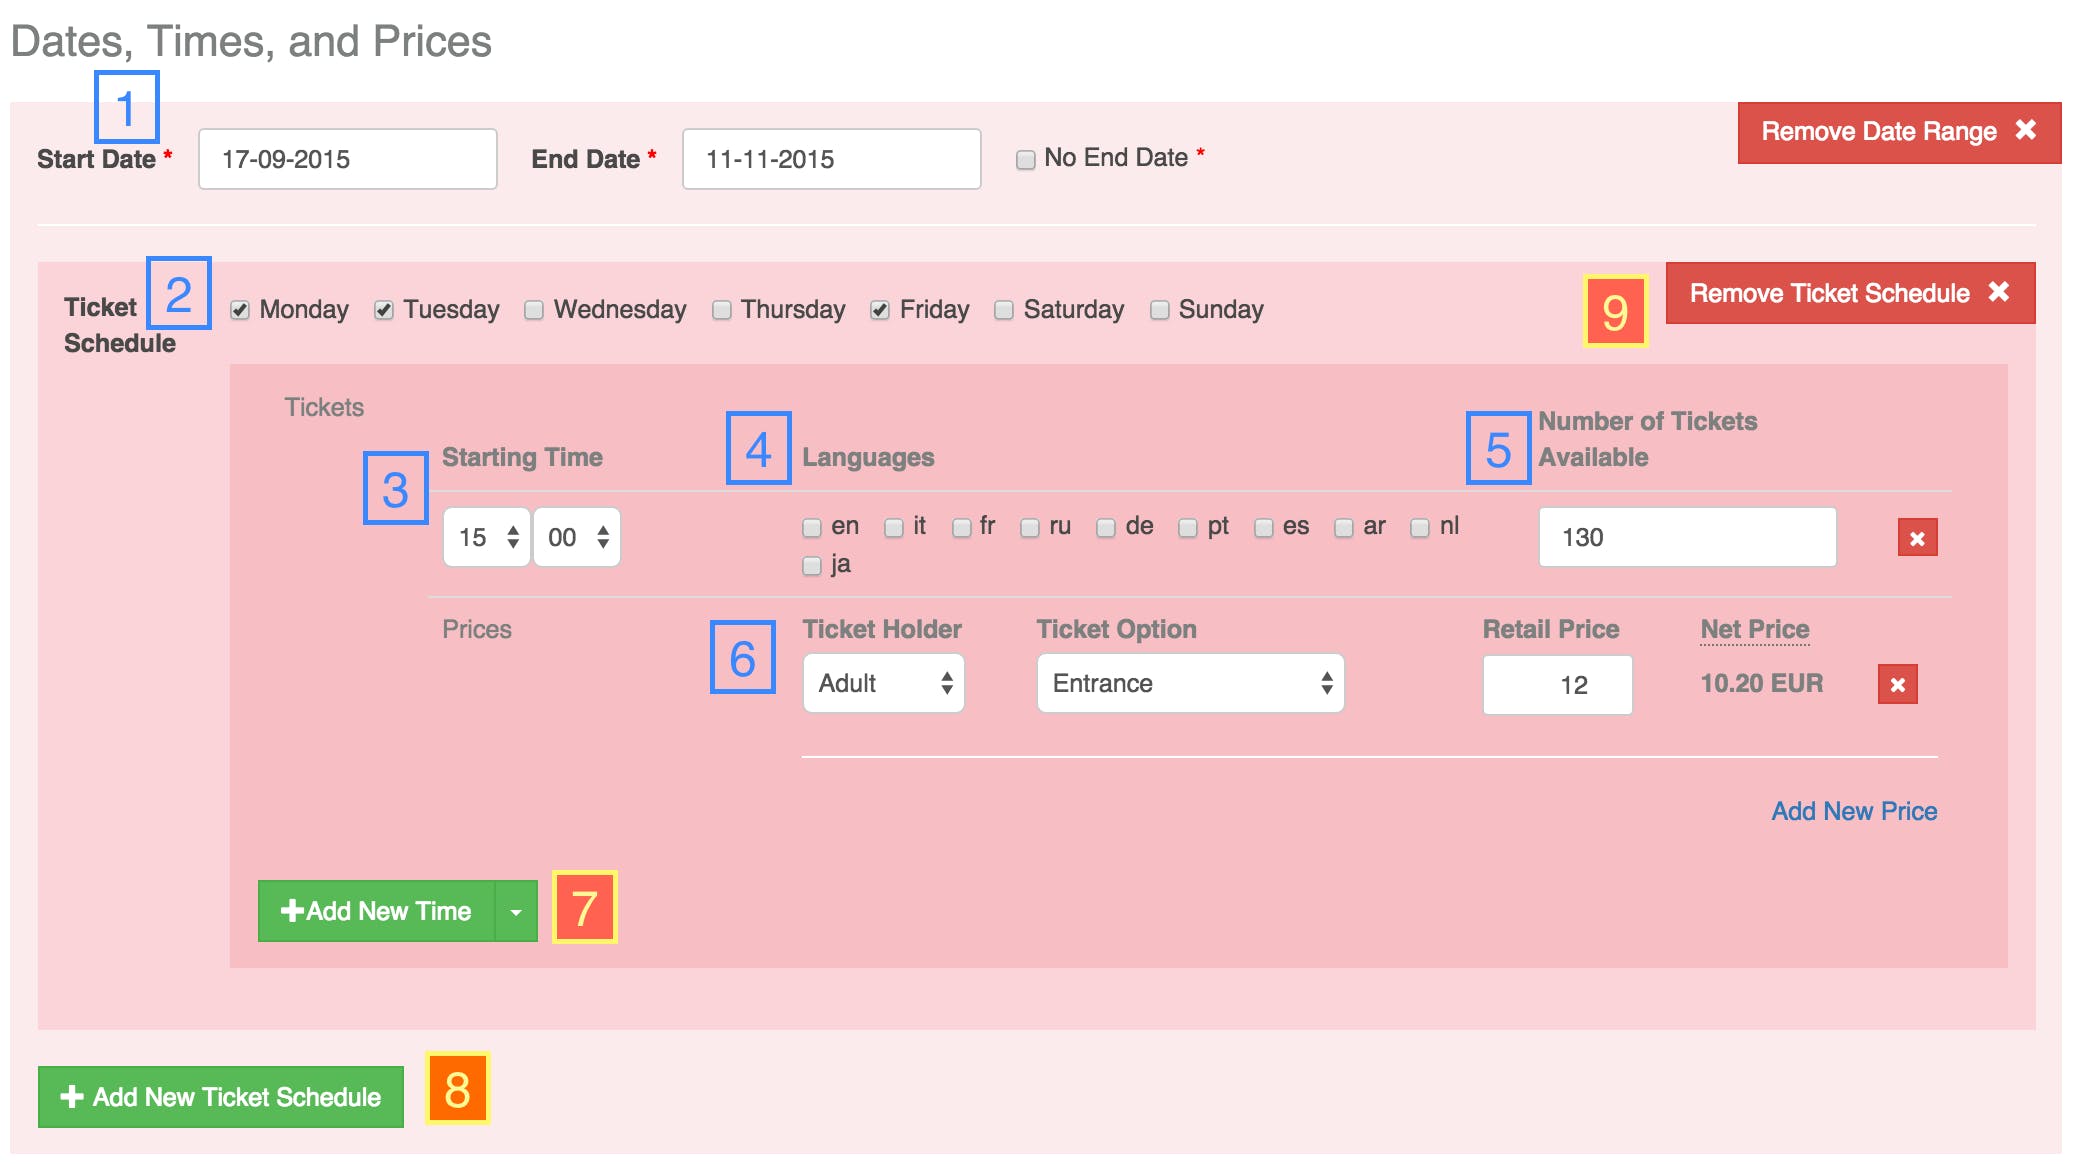
- STEP 10 - Dates, Times, and Prices -
Here you can select date ranges, ticket schedules and price labels.
Start/End Date
Refers to seasonality
Ticket Schedule
Check what days your product is available
Example: Monday, Tuesday, Friday
Starting time
If it is an open ticket, set the time the operation opens
Languages
The languages the product is offered in
If language is not relevant to your product (entrance tickets) then leave this blank
Number of tickets that are available
Total number of tickets available for that time slot (leave blank if there is no limit)
Price Labels, Type of ticket, and Price
You choose the public price and the net price will be calculated automatically, according to the agreed commission.
(OPTIONAL) Add another starting time by clicking here
(OPTIONAL) Create several date ranges by clicking here
Relating to different price labels and ticket schedules
(OPTIONAL) Remove ticket schedule
This removes the last ticket schedule you have added, not every ticket schedule
- STEP 10b - Cloning a Ticket Time & Price -
If you want to duplicate a ticket time and price, you can do so my following these steps:
Next to "Add New Time", click the drop-down arrow
Click "Clone ticket time & price"

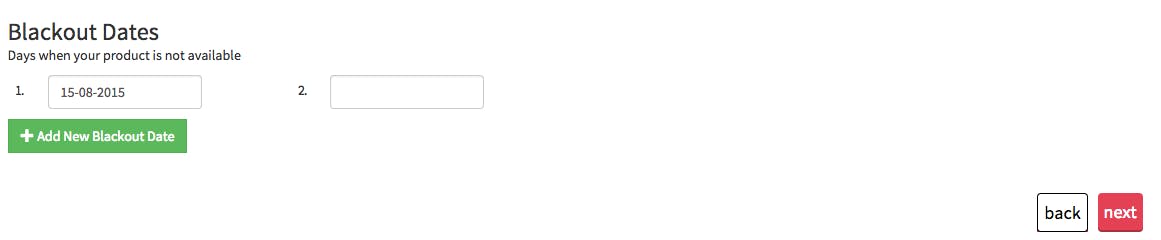
- STEP 11 - Blackout Dates -
Insert Blackout Dates if applicable. Then click "next" at the bottom of the page
- STEP 12 - Product Details -
On this page you can give more details about your product.
Group Details
Specify the type of tour (if applicable)
Features
Include any additional features that are included with your product
For example: Skip-the-Line Access, Fast Track, Official Reseller, Instant Confirmation
Free Cancellation refers to the customer being able to cancel their booking without penalty up to 72 hours before the booked date
Instant Confirmation refers to the customer receiving an email from Musement right after purchase confirming their booking
Services
Special services your product offers, as well as requirements for the clients
For example:
"Dress Code" if the clients need to wear specific clothing
"Access for the Disabled" if your product permits this
Minimum and Maximum spaces available
For example:
If there is a minimum of 2 people needed for your tour and a maximum of 10, insert 2 & 10 in the corresponding boxes

Mobile Voucher/Ticket (if applicable)
Specify if customers can present mobile vouchers or tickets

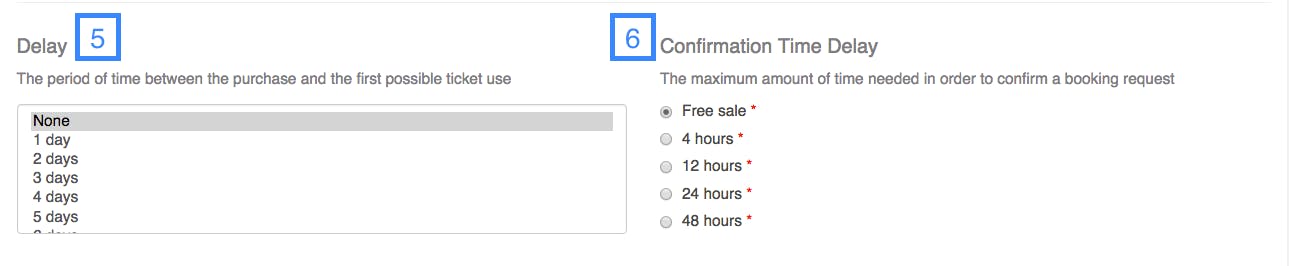
5. Ticket Use Delay (if applicable)
Specify the period of time between the purchase and the first possible ticket use
6. Confirmation Time Delay (if applicable)
Specify the maximum amount of time needed in order to confirm a booking request
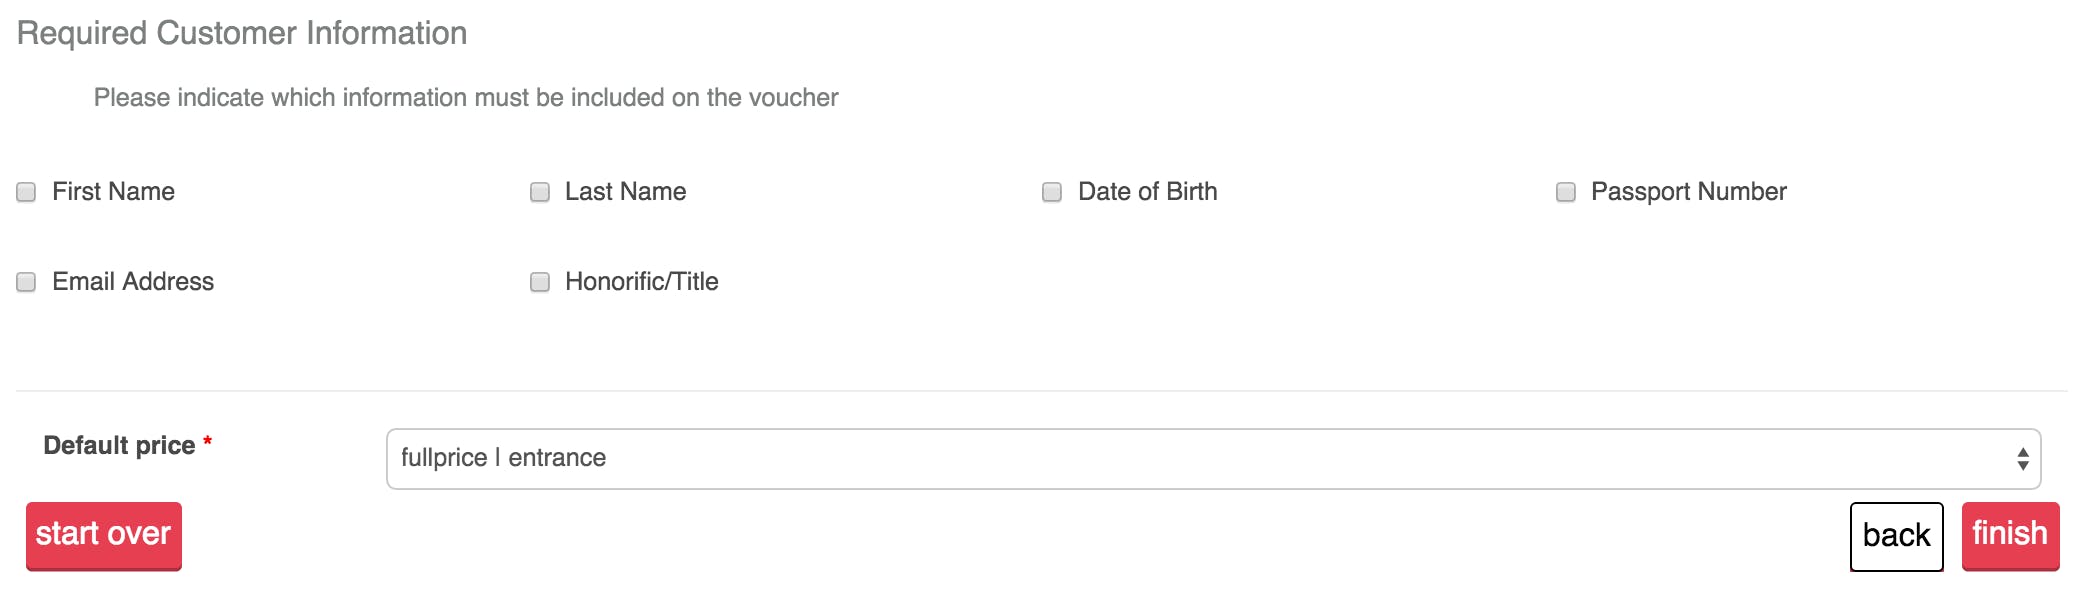
- STEP 13 - Passenger Information -
If your product requires specific customer information please select what you need from the choices below
Also select the default price (the price that is seen by default on Musement.com)
When you are done, click "finish"
This is what your product will look like on our website:
